Hot Foiling, Embossing & Die-Cutting - 2 Cards, Different Looks
Hey there and welcome to my creative blog. Today, I am working with a few different techniques and will demonstrate each of them in two card examples. These cards have very different looks with wildflower themes. I will outline the process steps below. Also, each will have a video summarizing the process. Be sure to see the supply list below which incorporates both of these card projects. Let's begin with hot foil wildflowers.
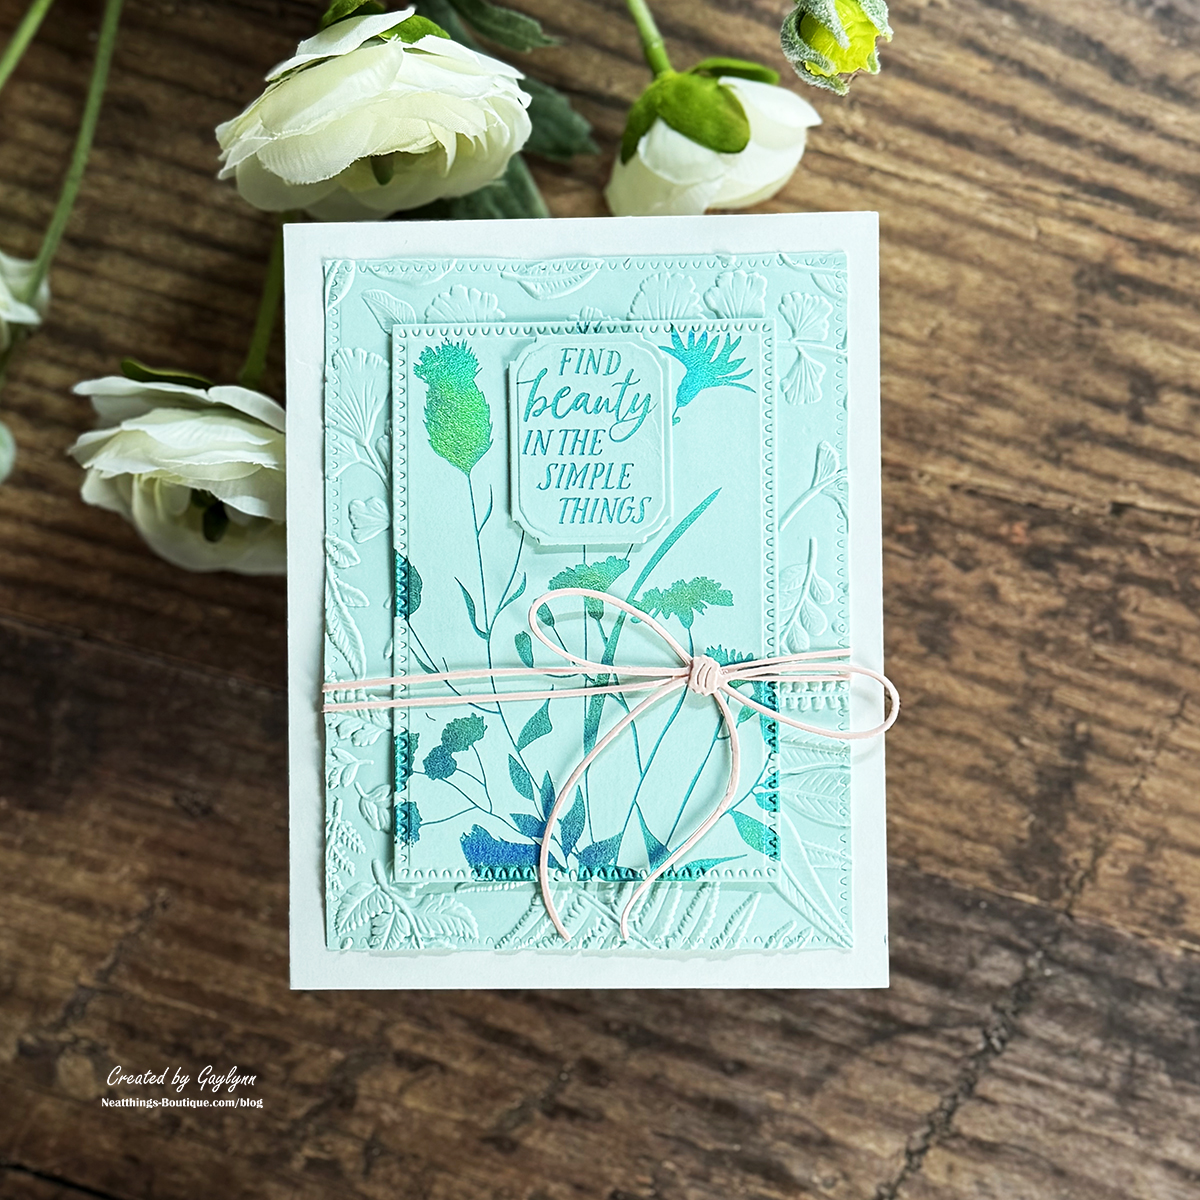
Sentiment: Find beauty in the simple things.
For the first card, I used hot foiling with Betterpress press plates. This large wildflower focal point shimmers beautifully. For this card, I used light blue cardstock and blue hot foiling.
The project supply list page for these two projects is at this link:
For the short video of the hot foil card process with 3D embossing, click here:
For the short video of the die-cut wildflowers card process, click here:
Helpful Tips - Hot foil wildflowers card:
Prepare an A2-sized card base from white cardstock, 4 1/4" x 5 1/2" folded.
Preheat the Glimmer Hot Foil platform.
Die-cut or trim a rectangle background panel from smooth light blue cardstock. 4" x 5 1/4" and dry emboss that panel.
Trim a smooth light blue panel rectangle to cover the press plate size and hot foil the wildflowers onto it using blue hot foil.
Trim or die-cut that foiled and pressed panel to a 2 3/4" x 4" rectangle.
Hot foil the darker blue sentiment onto light blue smooth cardstock, then trim or die-cut the sentiment label.
Hot foil the bloom wildly sentiment press plate using gold hot foil, then trim the sentiment. Use on the next card.
Die-cut the twine accent pieces in pale pink and assemble.
Adhere the embossed panel, the hot foil panel, the sentiment and the twine accent over the card base.
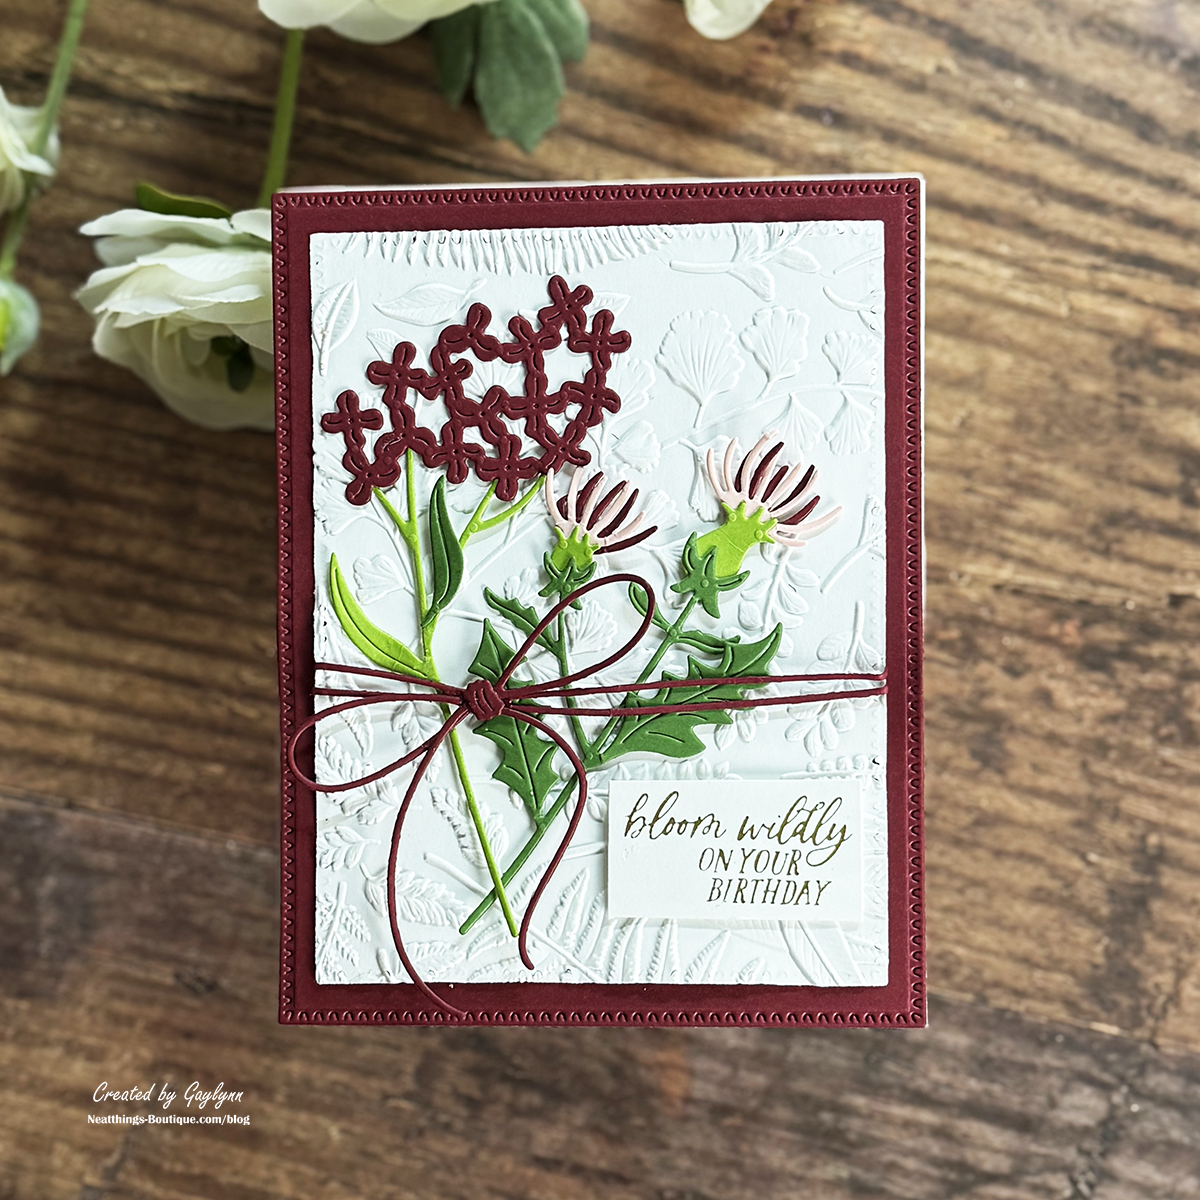
Sentiment: Bloom wildly on your birthday.
For this second card, I bundled a few die-cut wildflowers over dry embossing for a different look.
Helpful Tips - Die-cut wildflowers card:
Prepare an A2-sized card base from white cardstock, 4 1/4" x 5 1/2" folded.
Trim or die-cut a dark red or merlot background panel 4 1/4" x 5 1/2".
Trim or die-cut a white panel 4" x 5 1/4", then dry emboss that panel.
Select your wildflowers and die-cut the pieces of the flowers using your cardstock colors of choice.
Assemble three wildflowers using glue.
Die-cut the twine accent pieces in dark red or merlot and assemble.
Adhere the solid merlot panel, the white embossed panel, the layered flowers, the twine element, and the sentiment over the card base.
This is a handy list of some of my favorite affiliate shops, including my own.
My Card Making Classes Online: Grab individual courses, bundles or join my Gold Club Membership for everything.
Scrapbookcom Crafty Deals! Free gift. See the coupon page for deals, clearance and freebies.
Spellbinder Paper Arts New Colorwheel Cardstock! Clearance up to 70% off. Plus, new arrivals and Monthly Club Kits.
Hero Arts - See deals & last call categories, plus new arrivals.
Unity Stamp Company Incredible Sale, new arrivals and more.
Altenew See Ways To Save!
OrganizeMore Storage solutions for ink pads, markers, supplies, etc. Deals of the week, organizer spotlight, mini ink trays & more.
Kindle Books Browse e-books and Audible for audiobooks & podcasts.
Scrapbookpal Shop Copic Markers and crafty supplies, great values.
Get my Newsletter for my crafty updates plus a FREE CARD CLASS online for subscribing using this button!
Crafty deals: Visit the shops where I find my crafty supplies, solutions and services.
The project supply list page for these two projects is at this link:
Thank you for visiting.
Please take a moment to leave a comment and to say hello.
Just log in or create an account to comment and interact.
Gaylynn
2 comments

I really like the cards read the directions. Not a big video watcher but I am going to look at the video soon for the die-cut. I like the foil and embossing and have always been intrigued by foil but don’t know the ins and outs of it and see it needs another machine. Is it worth investing in another machine?
About to look at your favorite shops now. Thanks
Bethany
Hi Bethany. Thanks for reaching out.
There are two different types of foiling, hot foiling and regular/laminator foiling:
1. Hot foiling: I used the hot foil process with this blue foiled card. Here, I used the Glimmer Hot Foil system platform with a Betterpress press plate plus an added shim. With the Glimmer machine, you can use either Glimmer hot foil plates or Betterpress plates to hot foil, hence one foil machine. However, you will need a die-cutting/embossing machine to press the foil into the cardstock. I recommend the Spellbinders new and Improved Platinum 6 or larger Platinum die-cutting machine. But I also have examples of using the Glimmer machine with the Sizzix Big Shot die-cutting machine to press the foil. (Note: You can use Betterpress press plates with the Glimmer Hot Foil system. But you cannot use the Glimmer hot foil plates with the Betterpress system.) Recently, hot foiling has become a popular option, and for me, the easiest. I do think the Glimmer hot foil system is worth every penny as long as you have a compatible die-cutting machine to use with it.
2. Regular foiling, like deco foil, is for use with a very hot laminator. There are different ways to apply regular foil, like Deco Foil, sometimes hit or miss. The key is to have your laminator preheated at the hottest setting for at least 5 minutes before foiling. Other options for regular foiling are to heat emboss and then foil or use deco transfer gel with foil and run it through a die-cutting machine to press it in place. I have classes using these types of foiling.
3. A 3-D embossing folder was used in these cards. I will say that using the thick 3-D embossing folders is easiest to use with the Spellbinders Platinum die-cutting machines and their Universal plate system. Although I have used the Big Shot with the 3-D embossing folders. (Each brand may use a different embossing folder thickness, so we just have to play with the shims and plates to get it right, unless we use the same or compatible brand of machines.)
Here is the supply list for this particular project.
Good luck with the foil process. Let me know if you have questions along the way.
Best,
Gaylynn
My Crafty Shops
Where to find my most loved crafty products, services & events.
This section includes affiliate links to shops I love and use. As an affiliate and Amazon Associate, I earn from qualifying purchases. I may receive a small commission for the referral but at no cost to you.