Chirp Up Bird & Barn Window Background ~ Pairing Stamps
- Gaylynn Martling
- Unity Stamp Company, Copic Marker Coloring, Scene building, Die-cutting, Stamping, Floral, Animals, Encouragement, Friendship, Family, Fussy cutting, Get Well, Uplifting, Just because, Thinking of you, Support, Spring, greeting card, Summer
Hey there, friends. Welcome to my blog, it's Gaylynn. Today I am pairing bird and barn stamps to create the sweetest card scene. The combination creates easy card making. Try searching your stash for complementary stamps or icons. You may be surprised by what you come up with to create fantastic card scenes. To create this card, I used stamping, Copic marker coloring, fussy cutting and die-cutting. The featured products are from Chirp Up stamps plus the Background of the Month for March 2026 or the one-time purchase of The Ol' Farmhouse Window. I have included the project steps, a short video and supplies below.
See the full project affiliate supply list page for this project:
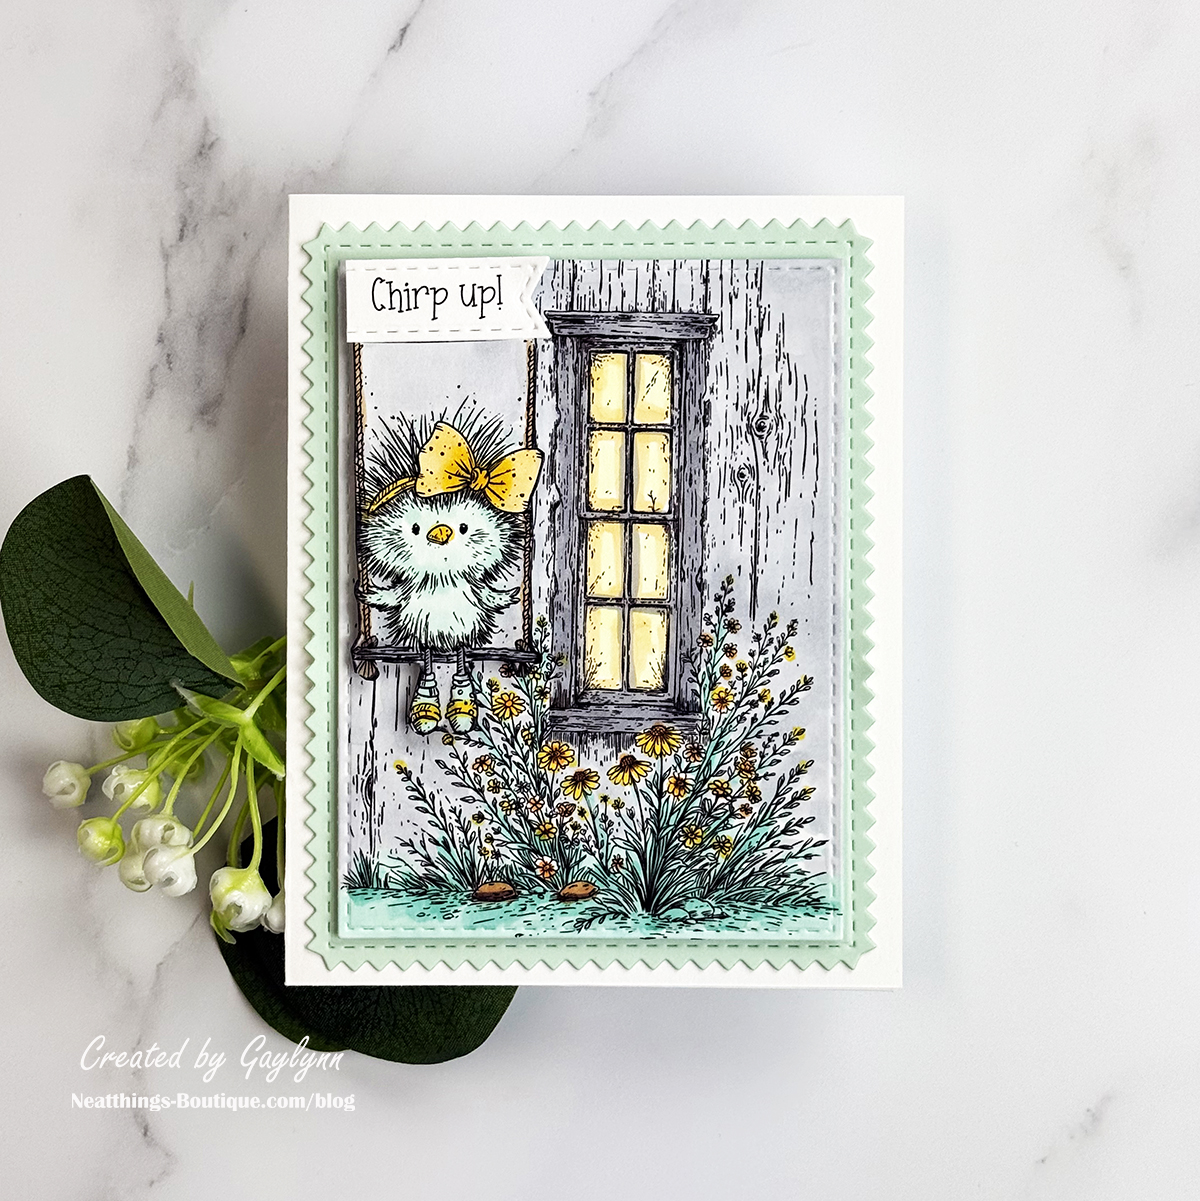
To begin, here is a look at the finished card.
Sentiment: Chirp Up.
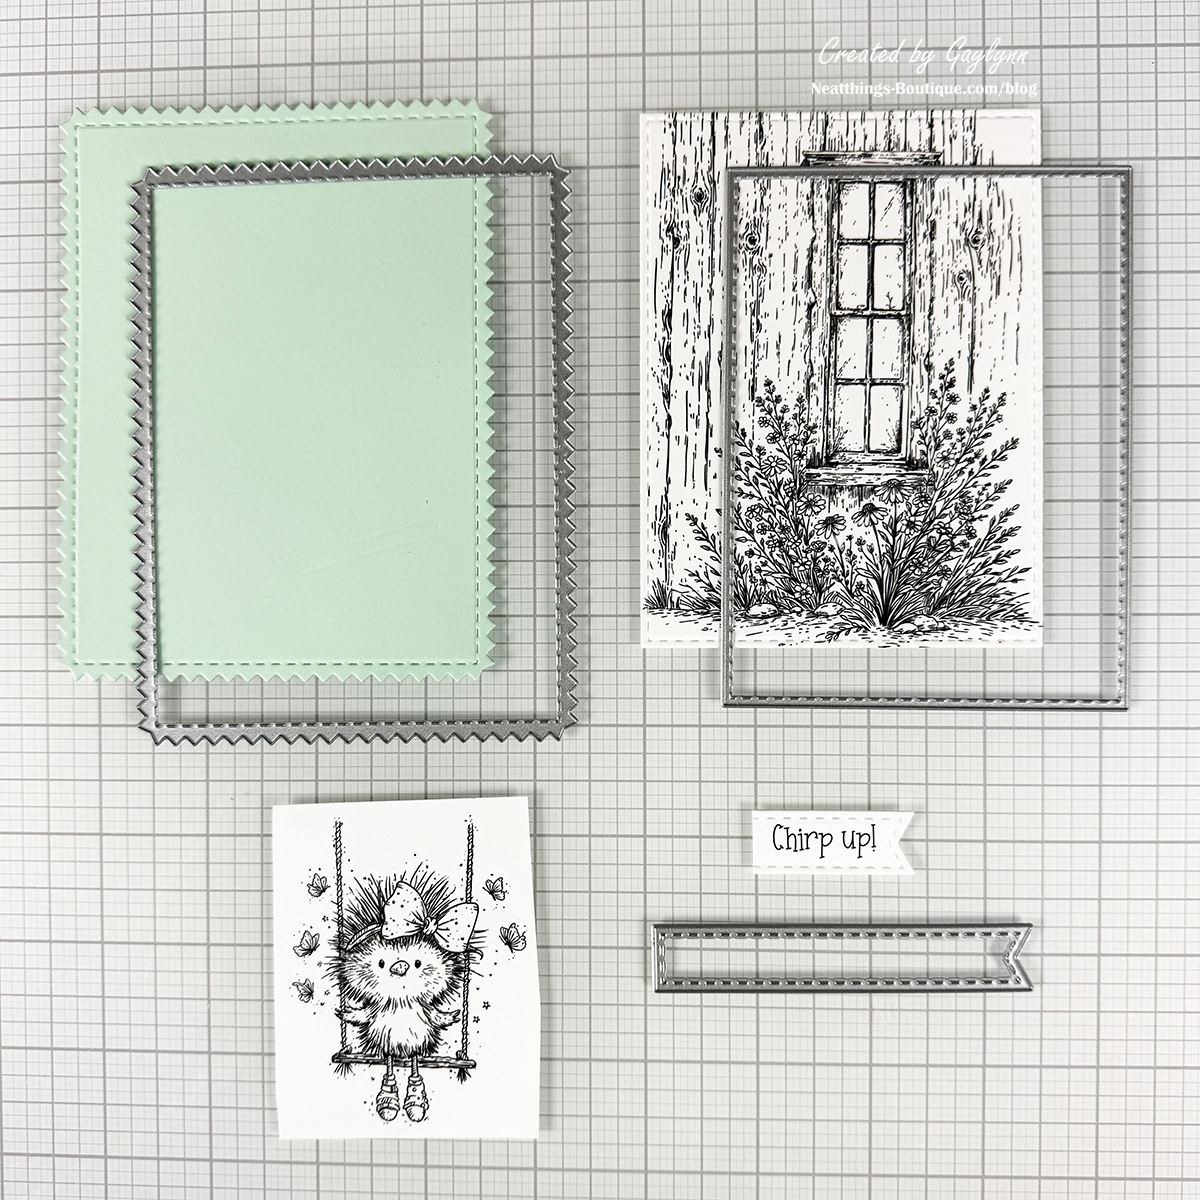
Next, this is a look at the first part of the process of making this card.
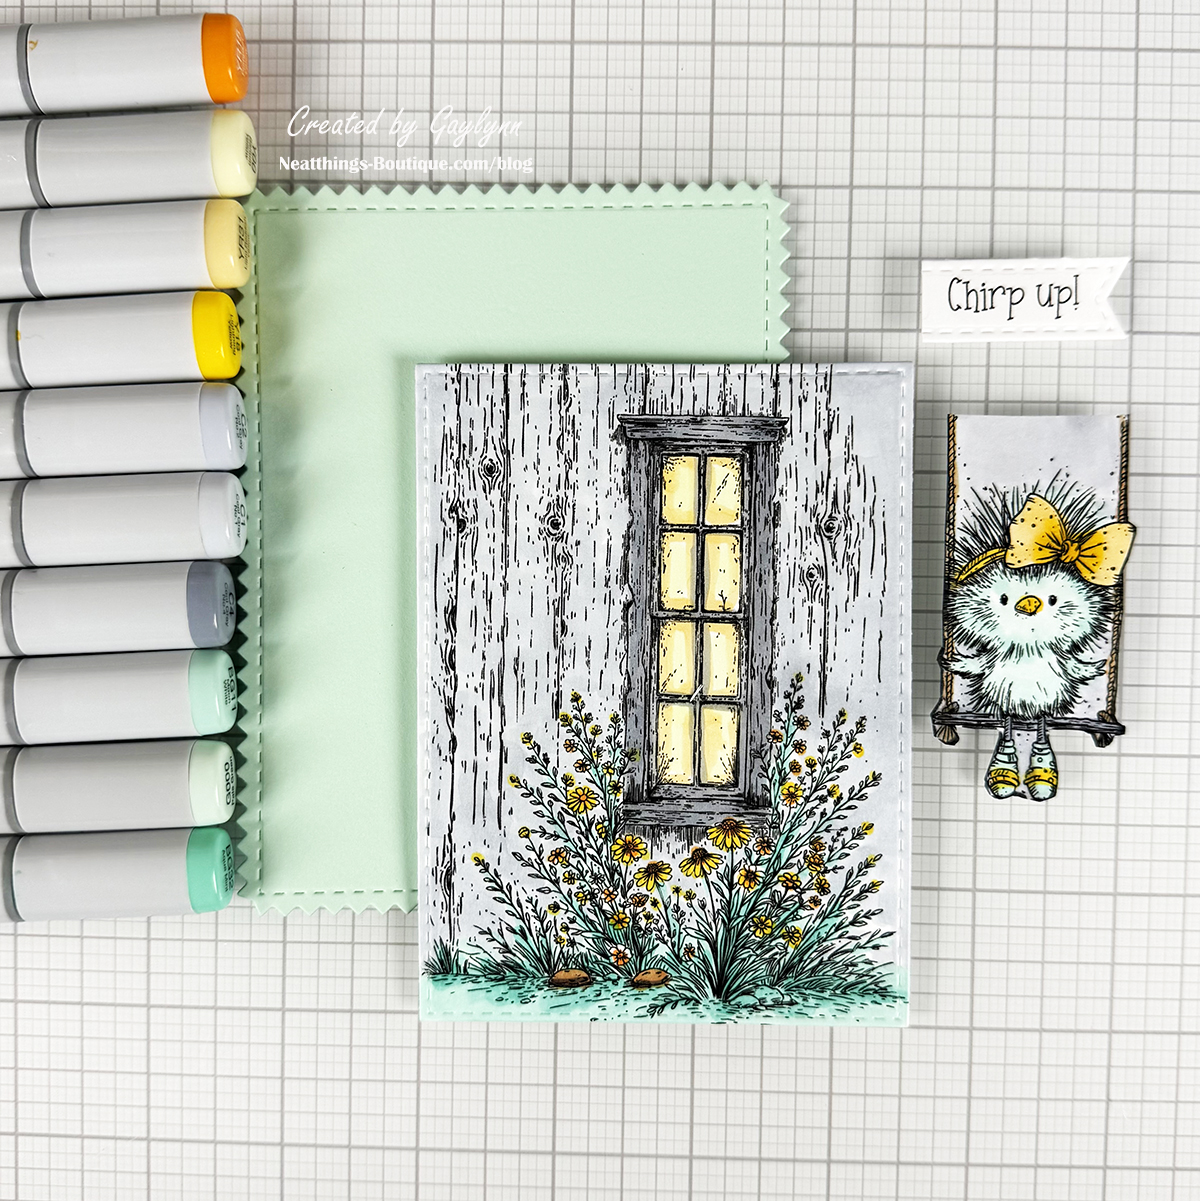
Also, take a look at the last part of the process.
Additionally, here is a summary of the steps.
Helpful Tips:
1. Prepare a vertical scored white card base 4 ¼” x 5 ½”.
2. Stamp The Ol’ Farmhouse Window, the Chip Up bird and the sentiment onto different pieces of smooth white cardstock. Use marker friendly black ink.
3. Die-cut the barn panel using the medium rectangle die from Zig Zag Rectangles.
4. Die-cut the mint background frame panel using the medium zig zag die.
5. Die-cut the sentiment using a small banner die from Scallops & Banners {nesting dies}.
6. Color the barn scene using markers in shades of gray, brown, orange, yellow, turquoise and mint.
7. Color the bird and swing stamping in coordinating colors. Also, color around the bird and the swing in the same gray color as the barn.
8. Fussy cut (cut out) the bird and swing, leaving the space between the swing ropes uncut. Cut a straight line at the top of the swing ropes to make an embellishment layer.
9. Adhere and layer the barn panel over the mint zig zag panel using thin foam tape.
10. Adhere the layered barn over the card base using double-sided flat tape.
11. Adhere the sentiment and the bird panel to the top left of the barn window, using thin foam tape.
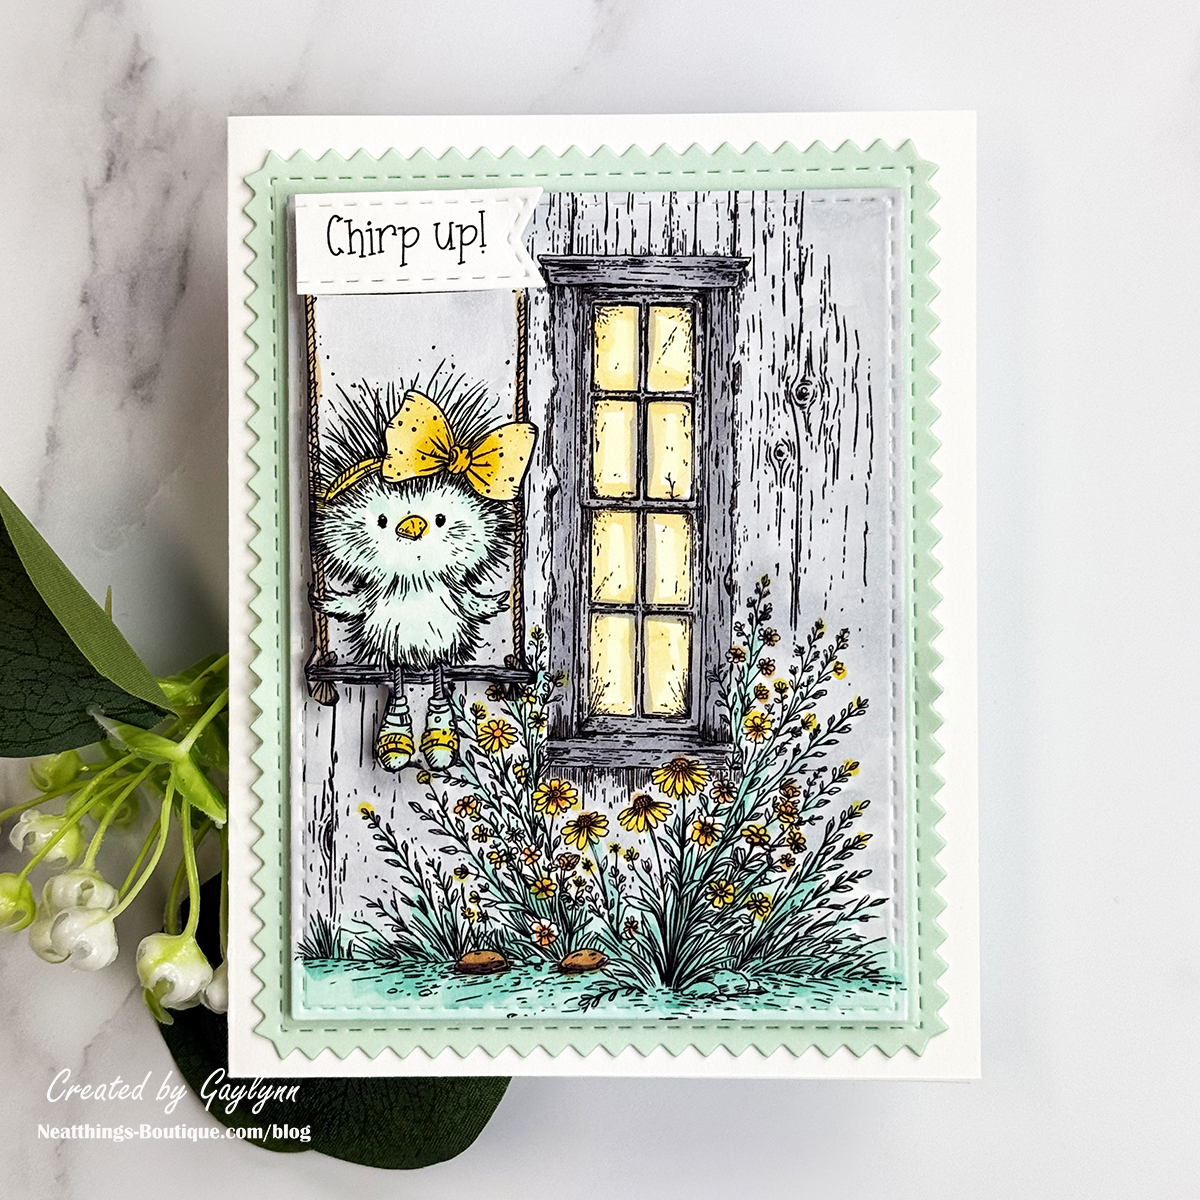
Finally, here is a closer look at this barn and bird card scene.
The full project affiliate supply list page for this project is at this link:
Get my Newsletter for my crafty updates, plus a FREE CARD CLASS online for subscribing using this button!
For convenience, I keep this page updated with my Favorite Shops, Events & Services.

Thank you for visiting. Please take a moment to leave a comment or to say hello.
Just log in or create an account to comment and interact.
Best,
Gaylynn
My Crafty Shops
Where to find my most loved crafty products, services & events.
This section includes affiliate links to shops I love and use. As an affiliate and Amazon Associate, I earn from qualifying purchases. I may receive a small commission for the referral but at no cost to you.